Wood shop organization can be a daunting task. Especially if you're like me and keep a lot of scrap wood. FYI-You can make a lumber storage cart and justify keeping ALL of those little pieces.
Some days you wake up and don't know what you're going to accomplish. I had the day to myself and puttered around the shop looking for a project I could check off my list. I was really looking for something that didn't require a drive to the hardware store or lumber yard.
With the weather turning very fall-like this week it was time to get the scrap pile of wood indoors. But in order to do that I needed to organize my lumber...but in order to do THAT I needed to build some storage.
Let me back up a bit. My husband and I just had a new shop addition built. Now we have his & hers shop spaces. Our contractor/friend (@jasonklemesrud) knows how thrifty I am and was really great about saving the off-cuts and scraps for me to use in future projects.


The New Shop Addition
It's cute, right? I wanted a shop that didn't look like an industrial eye-sore.
What better way to decrease the scrap pile than to use some of it on the organizer itself?
I'd been pinning lumber storage carts for a while on Pinterest and read/watched several tutorials that are really great. Here are some links to my inspiration that might help you.
But Before I Begin
Before I got started I realized that I need to build the circular saw guide that Marie, from Diy Montreal, suggests using. I've really needed one for a while and this was the perfect time to make it. I just so happened to have enough 3/4 inch birch leftover from a cabinet build so I had no excuses for putting this off any longer. I followed Marie's instructions perfectly and am so happy with how it turned out. I used it a ton in this project too. It's going to come in so handy in the future.
Diy Montreal's Circular Saw guide Plans I highly recommend making this. It's so great!


Before pic of my scrap lumber pile

I know I probably keep waaay too many small pieces of wood but I live far from a lumber yard and sometimes they come in handy.
PS. I can hear you whispering "hoarder"!!! lol
Most of the plans suggest 3/4 inch plywood but I had 1/2 in siding leftover so that's what I used. If I had the option I would have preferred 3/4 inch material but I made it work.
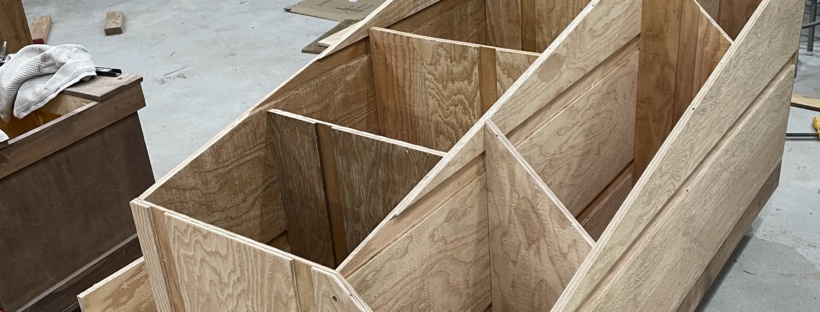
I started with a rough sketch of what I wanted and what would fit into my space. I built the main box and dividers first, then moved on to the front cubbies.
Lot's of pocket holes for this project. They are my favorite!

Then I moved on to the base. I use scrap 2x4s to make a frame and added 4x4 blocks for the casters to mount to. Yep, I split one! ugh! I flipped it over and added the base panel.

Almost Done!
I used the miter saw to cut the angles on the front corners and cubbies.
Now to mount the cubicles. I pre-drilled pocket holes along each bottom edge so mounting it was a breeze. I cut the side panels to size and mounted them as well.
I was able to use up most of the scrap siding and didn't have to purchase ANYTHING for this project. It was all scrap!! I even had the casters left over from a salvaged project. You can find those casters at The Home Depot btw.


It took me most of the day to complete, but it feels so good to be done.
Sheesh! You can see in the background that I still have a LOT of organizing to do. So many projects to build!!
After

Ta Da! The "After" photo is my fav. I'm so happy with it! Thanks to Marie at Diy Montreal, Ana White, and Shara from Wood Shop Diaries for their consistently fantastic projects and plans. 🙂
Before & After

